
Share a folder in Windows XP
- Open your Winodws Explorer
- Browse to the folder you want to share.
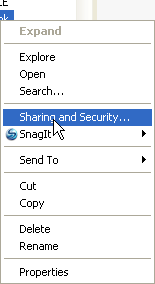
- Right-click on the folder and choose 'Sharing and Security'.
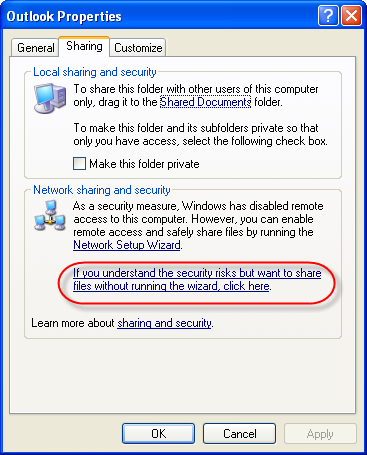
- The window 'Properties opens and the tab 'Sharing' is visible. If this is the
first time you want to share a folder then you need to click on the
warning 'If you understand the security risks but want to share files
without running the wizard, click here.'
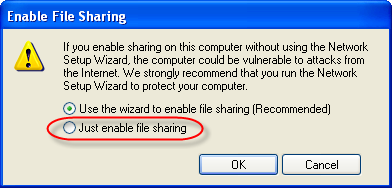
- After clicking on this warning you need to confirm this action. Select 'Just
enable file sharing' and click on OK.
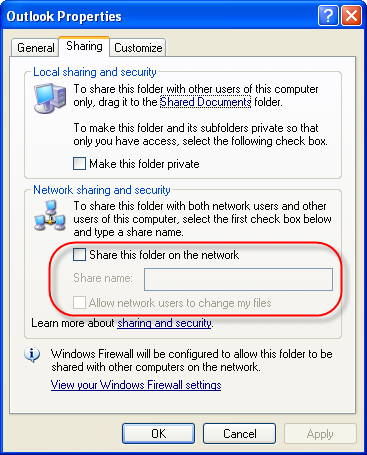
- The tab 'Sharing' is displayed again with additional options. Check the option
'Share this folder on the network'. Enter a name in the text field
'Share name' and finally check the option 'Allow network users to
change my files'.
- You successfully shared your folder on the network:
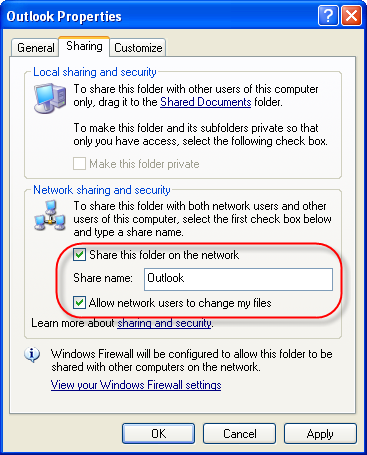
- Click on 'OK' to close this window.
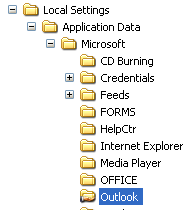
You see in your Explorer that this folder is now shared:
- If you want to access this shared folder from another computer then you type in
the address bar of Windows Explorer or in a search window
\\[Name of computer\[Name of share]
In our example let's name the computer 'Mars' and our named share is 'Outlook'. Then you need to address the share with the following line:
\\Mars\Outlook
- It's a good advice to create your users on all your computers with the same name
and password. This way you can access easily the files on the other
computer.